
{
“@context”: “https://schema.org”,
“@type”: “HowTo”,
“name”: “How to Install Pavers Like a Professional”,
“description”: “Complete guide to installing pavers for outdoor spaces including patios, walkways, and driveways”,
“image”: “https://2hrescreening.com/wp-content/uploads/2025/03/394c2b3e-76ed-4a65-b301-dea4508bceb8.webp”,
“totalTime”: “PT2D”,
“estimatedCost”: {
“@type”: “MonetaryAmount”,
“currency”: “USD”,
“value”: “2-10”
},
“supply”: [
{
“@type”: “HowToSupply”,
“name”: “Pavers”
},
{
“@type”: “HowToSupply”,
“name”: “Crushed stone base”
},
{
“@type”: “HowToSupply”,
“name”: “Bedding sand”
}
],
“tool”: [
{
“@type”: “HowToTool”,
“name”: “Excavator”
},
{
“@type”: “HowToTool”,
“name”: “Plate compactor”
},
{
“@type”: “HowToTool”,
“name”: “Level”
}
],
“step”: [
{
“@type”: “HowToStep”,
“name”: “Site Preparation”,
“text”: “Measure and prepare the site by excavating 6-10 inches deep and ensuring proper drainage slope”
},
{
“@type”: “HowToStep”,
“name”: “Base Installation”,
“text”: “Install 4-6 inches of crushed stone base and compact thoroughly”
},
{
“@type”: “HowToStep”,
“name”: “Paver Installation”,
“text”: “Lay pavers starting from the lowest corner, ensuring tight fit and proper alignment”
}
]
}
body {
font-family: ‘Segoe UI’, Tahoma, Geneva, Verdana, sans-serif;
line-height: 1.6;
color: #333;
max-width: 1200px;
margin: 0 auto;
padding: 20px;
background-color: #f9f9f9;
}
.container {
background-color: white;
padding: 40px;
border-radius: 10px;
box-shadow: 0 4px 6px rgba(0,0,0,0.1);
}
h1 {
color: #2c3e50;
font-size: 2.5em;
margin-bottom: 20px;
text-align: center;
border-bottom: 3px solid #3498db;
padding-bottom: 15px;
}
h2 {
color: #34495e;
font-size: 1.8em;
margin-top: 40px;
margin-bottom: 20px;
border-left: 4px solid #3498db;
padding-left: 15px;
}
h3 {
color: #2c3e50;
font-size: 1.3em;
margin-top: 30px;
margin-bottom: 15px;
}
.intro {
font-size: 1.1em;
background-color: #ecf0f1;
padding: 25px;
border-radius: 8px;
margin-bottom: 30px;
border-left: 5px solid #3498db;
}
.key-points {
background-color: #e8f5e8;
padding: 25px;
border-radius: 8px;
margin: 30px 0;
border: 2px solid #27ae60;
}
.key-points ul {
margin: 0;
padding-left: 20px;
}
.key-points li {
margin-bottom: 10px;
font-weight: 500;
}
.video-container {
text-align: center;
margin: 40px 0;
background-color: #f8f9fa;
padding: 30px;
border-radius: 10px;
border: 2px dashed #3498db;
}
.video-container iframe {
max-width: 100%;
border-radius: 8px;
box-shadow: 0 4px 8px rgba(0,0,0,0.2);
}
.image-container {
text-align: center;
margin: 40px 0;
}
.image-container img {
max-width: 100%;
height: auto;
border-radius: 10px;
box-shadow: 0 4px 8px rgba(0,0,0,0.2);
}
.image-caption {
font-style: italic;
color: #666;
margin-top: 10px;
font-size: 0.9em;
}
.faq-section {
background-color: #f8f9fa;
padding: 30px;
border-radius: 10px;
margin: 40px 0;
}
.faq-item {
margin-bottom: 25px;
padding-bottom: 20px;
border-bottom: 1px solid #dee2e6;
}
.faq-item:last-child {
border-bottom: none;
}
.faq-question {
font-weight: bold;
color: #2c3e50;
margin-bottom: 10px;
}
.faq-answer {
color: #555;
}
.cta-section {
background: linear-gradient(135deg, #3498db, #2980b9);
color: white;
padding: 40px;
border-radius: 10px;
text-align: center;
margin: 40px 0;
}
.cta-section h2 {
color: white;
border: none;
padding: 0;
margin-bottom: 20px;
}
.cta-button {
display: inline-block;
background-color: #e74c3c;
color: white;
padding: 15px 30px;
text-decoration: none;
border-radius: 5px;
font-weight: bold;
font-size: 1.1em;
margin: 10px;
transition: background-color 0.3s;
}
.cta-button:hover {
background-color: #c0392b;
}
strong {
color: #2c3e50;
font-weight: 600;
}
a {
color: #3498db;
text-decoration: none;
}
a:hover {
text-decoration: underline;
}
@media (max-width: 768px) {
body {
padding: 10px;
}
.container {
padding: 20px;
}
h1 {
font-size: 2em;
}
h2 {
font-size: 1.5em;
}
}
Transform Your Outdoor Space: Complete Professional Paver Installation Guide
If you’re looking to transform your outdoor space with the beauty and durability of pavers, you’ve come to the right place! Installing pavers might seem challenging, but with the right preparation and expert tips, you can create a stunning patio, an inviting entrance, or a durable walkway that adds value to your property. What’s the secret to a successful project? Let’s discover it together with the expertise of 2H Rescreening, your specialist in outdoor space solutions.
Key Points for Flawless Paver Installation:
- Site Preparation: Measure and prepare the site precisely, excavating 6-10 inches deep and ensuring a slight slope for efficient water drainage.
- Solid Base: Use a 4-6 inch layer of crushed stone as a stabilizing base, compacting it thoroughly before applying bedding sand.
- Smart Choice: Select pavers that match your style and are suitable for your local climate, ensuring long-term beauty and durability.
- Regular Maintenance: Clean and inspect your pavers periodically to identify and correct early wear, extending their lifespan and appearance.
- Avoid Common Mistakes: Ensure adequate site preparation, use appropriate base materials, and maintain a consistent maintenance routine for the best results.
Step-by-Step Guide: Install Your Pavers Like a Professional
Watch our comprehensive video guide for professional paver installation techniques
Installing pavers can be simpler than you imagine when following the correct steps. Get ready to transform your environment!
First, gather your essential tools for paver installation: an excavator, plate compactor, and shovels will be your greatest allies. Start by excavating the terrain to at least 15 inches (approximately 38 cm) deep, preparing the way for the best paver base materials, such as washed crushed stone from 3/4 to 2 inches. Apply the layers, starting with a firm base, then level a 1/4-inch stone layer for a smooth surface.
Now, the most rewarding part: how to lay pavers on sand. Begin positioning them from the lowest corner, ensuring they fit perfectly. Don’t forget to fill the joints with 1/4-inch stone to secure the pavers in place.
Finally, compact the entire area. With these DIY paver installation tips, you’ll create a durable entrance or patio with a fantastic look!
Preparing Your Surface: The Secret to Perfect Paver Installation
Surface preparation is the starting point for successful paver installation. A solid base is fundamental – it prevents displacement and sinking, providing a level surface for paver placement.
Start by measuring your area with stakes and string, then excavate 6-8 inches deep (10 inches if you’re in a colder climate). If your soil requires it, use geotextile fabric to assist with drainage and stabilization.
Next, apply a 4-6 inch layer of crushed stone or gravel. This material interlocks perfectly, unlike rounded stones that can slide around.
Compact this layer well, then add 1-2 inches of bedding sand on top. Level it out and check the slope to ensure adequate drainage.
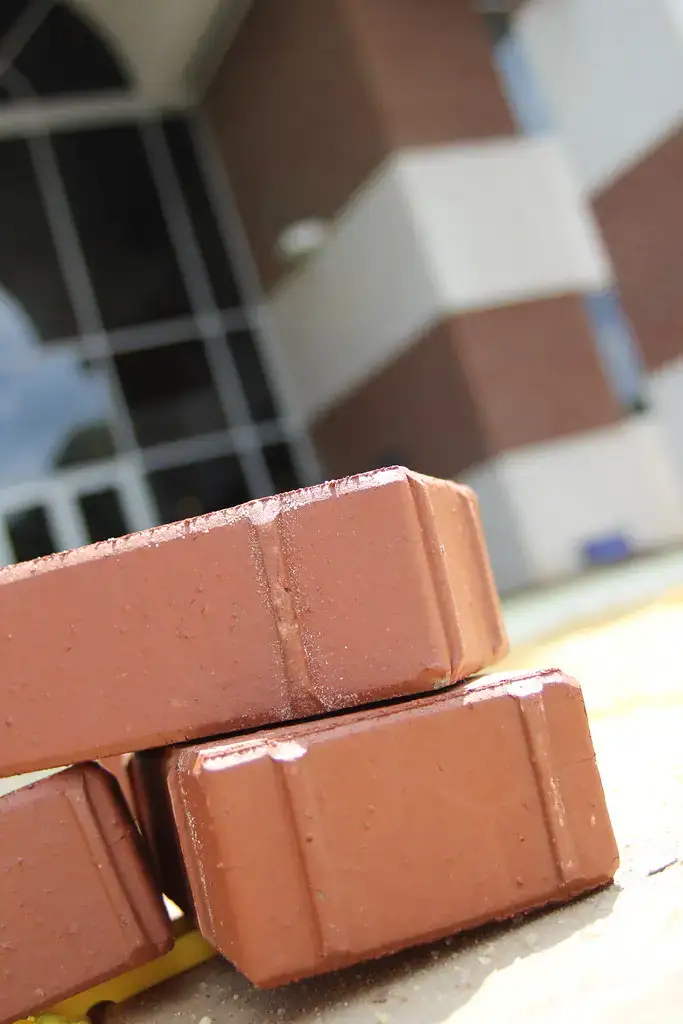
Choosing the right material is very important for the paver installation journey
Choosing the Right Pavers for Your Project: Style and Durability
Choosing the ideal pavers can define the success of your outdoor space. Start by considering the style you want to achieve.
For a modern look, concrete pavers are a versatile and economical option, available in various colors and textures. Think smooth, elegant finishes or rustic textures – there’s an option for every taste!
If you prefer traditional charm, clay brick pavers might be the best choice, with their earthy tones and robust construction.
For a more artistic atmosphere, natural stone pavers, such as flagstone or travertine, can create stunning pathways and patios.
Don’t forget about color! Dark gray adds sophistication, while red can create a striking visual impact.
Whatever your choice, make sure it complements the overall design of your space. This way, your pavers will not only look great but also fulfill the purpose you have in mind!
Essential Tips for Paver Longevity and Durability
While you might think that once your pavers are installed, the hard work is done, keeping them in excellent condition is equally important. Regular maintenance is key to preventing wear and costly repairs.
Start with daily cleaning to prevent dirt buildup and perform weekly inspections to identify any wear before it worsens. Stay alert for fluids and leaks, and don’t forget to lubricate moving parts according to manufacturer guidelines!
Proper operator training is also vital; a well-trained team ensures consistent and efficient operation. Establish a relationship with a reliable service provider for those specialized inspections.
And remember, seasonal changes can impact your pavers, so adjust your maintenance routine accordingly. With a little effort, you can ensure your pavers remain durable and stunning for many years!
Common Paver Installation Mistakes and How to Avoid Them
When installing pavers, it’s easy to overlook crucial details that can generate major problems in the futur
(Content truncated due to size limit. Use line ranges to read in chunks)