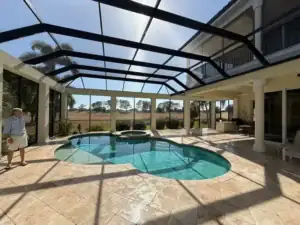
Patio screens are essential for creating comfortable, pest-free outdoor spaces. However, with regular exposure to the elements, these screens can suffer damage over time. Whether it’s a small tear or a completely ripped screen, knowing how to repair it yourself can save you time and money. This detailed guide from 2H Rescreening experts will walk you through identifying common patio screen issues, gathering the right tools, and completing repairs step by step.
Common Patio Screen Problems and Their Solutions
Before diving into the repair process, it’s helpful to understand the typical issues patio screens face and their respective solutions:
1. Tears and Holes
- Problem: Tears are often caused by sharp objects, pets, or harsh weather conditions.
- Solution: Small tears can be patched with screen repair tape, while larger holes may require replacing the entire section.
2. Loose Screens
- Problem: Over time, the screen may sag or come loose from the frame.
- Solution: Tighten the screen by adjusting the spline or replacing it entirely.
3. Damaged Frames
- Problem: Aluminum or wooden frames can bend, crack, or weaken due to prolonged exposure to moisture or impacts.
- Solution: Replace the damaged section of the frame or reinforce it with corner brackets.
4. Corroded Spline
- Problem: The spline that holds the screen in place can degrade, leading to a loose fit.
- Solution: Remove the old spline and replace it with a new, appropriately sized one.
Understanding these common issues helps you choose the best repair method and prevents unnecessary replacements.

Tools and Materials You’ll Need for Patio Screen Repair
Having the right tools and materials is crucial for a successful repair. Here’s a list of essentials:
Tools
- Flathead screwdriver: For removing the spline.
- Screen roller tool: To install the new spline securely.
- Utility knife: For trimming excess screen material.
- Measuring tape: To ensure accurate cuts.
- Scissors: For cutting the screen material.
- Rubber mallet: For gently reshaping bent frames.
Materials
- Replacement screen: Fiberglass or aluminum, depending on your preference.
- Spline: Available in various sizes; match it to your frame’s groove.
- Screen repair tape: For patching small tears.
- Frame repair kit: Includes corner brackets and other reinforcements.
Having these tools and materials on hand ensures a smooth and efficient repair process.
How to Remove a Damaged Screen from the Frame
Removing the old screen is the first step in the repair process. Follow these steps:
Step 1: Prepare the Workspace
- Lay the frame on a flat, clean surface to avoid additional damage.
Step 2: Remove the Spline
- Use a flathead screwdriver to lift one end of the spline from the groove.
- Pull out the spline carefully, as you may be able to reuse it if it’s still in good condition.
Step 3: Detach the Screen
- Once the spline is removed, lift the damaged screen from the frame.
- Inspect the groove for any debris or corrosion and clean it thoroughly.
Step 4: Inspect the Frame
- Check for bends, cracks, or other damage to the frame and make necessary repairs before proceeding.
Removing the damaged screen properly ensures the new screen fits securely and performs optimally.

Step-by-Step Process for Installing a New Patio Screen
Replacing the screen might seem daunting, but following these steps will make the process straightforward:
Step 1: Cut the Replacement Screen
- Measure the dimensions of the frame and add an extra inch to each side for trimming.
- Cut the replacement screen to size using scissors or a utility knife.
Step 2: Position the Screen
- Lay the screen over the frame, ensuring it covers the entire opening with some overlap.
Step 3: Insert the Spline
- Start at one corner and use a screen roller tool to press the spline into the groove, securing the screen.
- Work your way around the frame, keeping the screen taut to avoid wrinkles.
Step 4: Trim Excess Material
- Use a utility knife to carefully trim the excess screen along the edge of the frame.
- Ensure a clean finish by cutting as close to the spline as possible.
Step 5: Inspect the Finished Screen
- Check for any loose areas or wrinkles and adjust as needed.
- Test the frame’s fit in its original position to ensure proper installation.
With these steps, you’ll have a secure and professional-looking patio screen.
Tips to Maintain and Extend the Life of Your Patio Screen
Regular maintenance can significantly extend the lifespan of your patio screen. Here are some tips:
1. Clean Regularly
- Use a soft brush or vacuum attachment to remove dust and debris.
- Wipe the screen with a mild soap solution to prevent buildup.
2. Inspect for Damage
- Check for tears, loose spline, or frame issues every few months.
- Address minor problems immediately to avoid costly repairs later.
3. Avoid Sharp Objects
- Keep sharp tools and objects away from the screen to prevent accidental tears.
4. Use Protective Coatings
- Apply a UV-resistant spray to minimize sun damage.
- Consider anti-corrosion coatings for metal frames in humid environments.
5. Store Properly During Off-Season
- If you remove screens during winter, store them flat in a dry area to prevent warping or damage.
Following these maintenance tips will keep your patio screen looking and functioning like new for years to come.
Frequently Asked Questions
1. Can I repair a small tear without replacing the entire screen?
Yes, small tears can be patched using screen repair tape or adhesive patches specifically designed for screens.
2. How long does a patio screen typically last?
With proper care and maintenance, a patio screen can last 7-10 years, depending on the material and exposure to elements.
3. What type of screen material is best for patios?
Fiberglass is the most popular choice due to its durability and flexibility, while aluminum screens are more resistant to punctures but can dent.
4. How do I know what size spline to use?
Measure the groove in the frame or bring a sample of the old spline to a hardware store to find the correct size.
5. Can I reuse the old spline?
If the old spline is still in good condition, it can be reused. However, replacing it ensures a tighter and more secure fit.
Repairing a patio screen is a straightforward process that anyone can tackle with the right tools and guidance. By following this step-by-step guide, you’ll save money and extend the life of your screen, ensuring your outdoor space remains functional and inviting. If you don’t want to do this all by your self then call us today or learn more about our services. Last but not least, with regular maintenance, your patio screen will provide years of enjoyment and protection.